
The exact steps that need to be followed to enable or disable push notifications depend on your device type.
To make things easier for you, here we have prepared a detailed guide that you can follow to enable or disable push notifications.
So, without any further ado, let’s get started –
What Are Push Notifications?
Push notifications are short messages or alerts that are sent to visitors or users’ devices, such as smartphones, tablets, or computers, by apps, websites, or services.
These notifications pop up on the device’s screen, even if the corresponding app or website is not actively in use.
Businesses use push notifications to update users regarding upcoming sales, recent news, new features or products, etc.
Do I need to enable notifications to receive Push Notifications?
Yes, you need to enable notifications to receive push notifications.
For web push notifications, you typically need to grant permission for a website to show notifications. This is usually done through a browser prompt or by adjusting browser settings.
For app push notifications, users need to enable notifications for specific apps in their device settings. This allows the apps to send alerts, updates, or messages even when the app is not actively open.
Without the user’s explicit permission to receive notifications, the system won’t allow apps or websites to send push notifications to their device. This is a privacy and user control measure to ensure that users have control over the types of alerts they receive.
Steps to Enable Push Notification on Desktop Web Browser
To enable push notifications on a web browser, follow these simple steps –
- Launch the browser of your choice.
- Open browser settings.
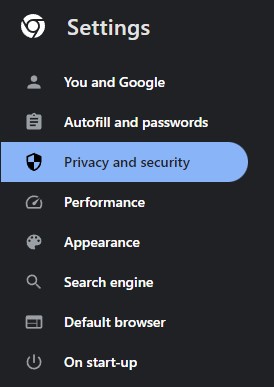
- Click on the Privacy and Security option.
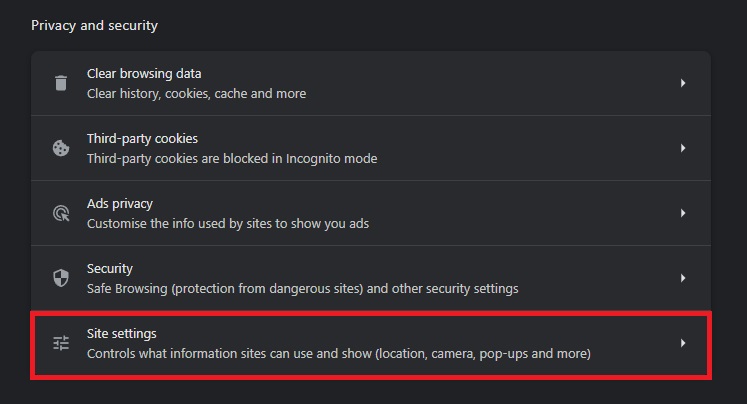
- Click on the Site Settings option.
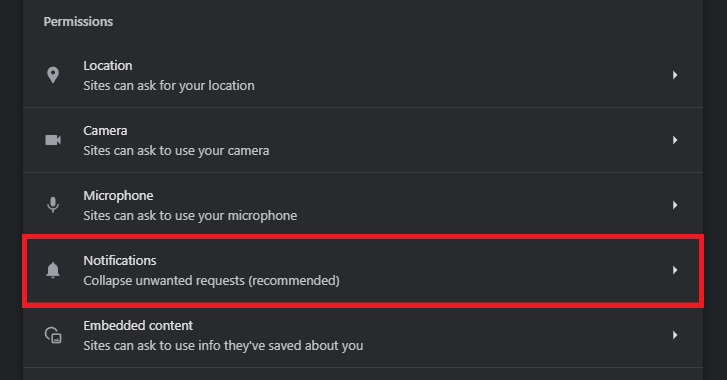
- Next, click on the Notifications option.
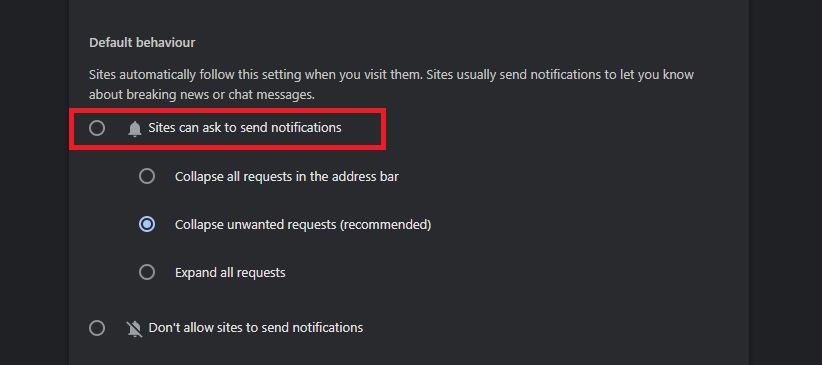
- Make sure to toggle on the “Site Can Ask To Send Notification” option.
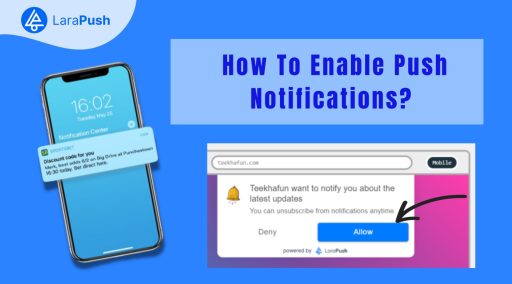
Once you are done with these steps, any website you visit can send you an opt-in notification.
This is what an opt-in notification looks like:

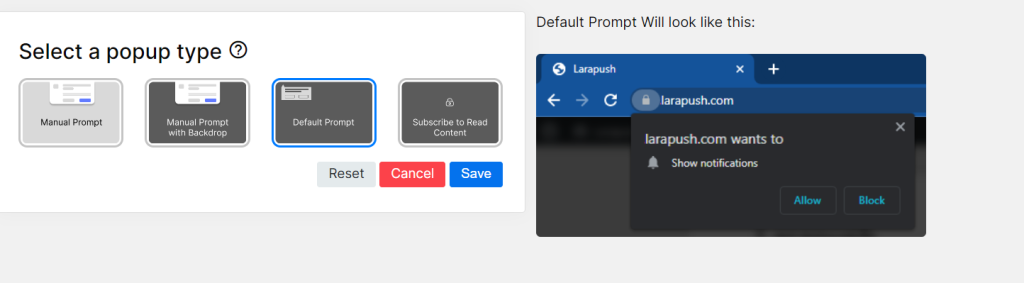
Note that how these web push notifications will appear on your screen will entirely depend on how the website has configured it, as web push notification service providers like LaraPush allow businesses to customize these opt-in prompts.
The default prompt looks like the image below:
Steps to Enable Push Notification on Android
You can follow these simple steps to enable push notifications on Android smartphones –
- Open the device’s “Settings.”
- Find and select “Apps” or “Applications.”
- Click on “All App” to get the list of apps installed on your device.
- Locate the app you’re interested in and click on permissions.
- Scroll down to find the “Notification” option. Select it.
- Toggle On The Notification
Remember, these are general guidelines, and the exact steps might differ slightly based on the device or Android version.
Always refer to the specific instructions provided by the browser or app for the most accurate information.
Conclusion
There you have it – a detailed guide on how to enable or disable push notifications. And I hope you find this article helpful.
Enabling or disabling push notifications is actually quite simple and easy. All you need to do is follow the aforementioned steps, and you’re all set to receive push notifications.
With that said, here I am wrapping up this article. If you have any questions, feel free to shoot them in the comment section below. Our team will try to respond ASAP.