Want to implement push notifications in React Native? If yes, you have stumbled upon the right webpage.
Here, we have provided a detailed step-by-step guide you can follow to implement push notifications in React Native –
Implement Using Native Platform-Specific Notification Services (FCM/APNs)
React Native allows direct integration with native modules for Android and iOS platforms, enabling developers to use Firebase Cloud Messaging (FCM) for Android and Apple Push Notification service (APNs) for iOS.
For Android
FCM is a robust service provided by Google, offering a free and reliable push notification solution for mobile. Developers can integrate FCM into their React Native projects by linking Firebase to their app, obtaining a unique token for each device, and handling notifications through native code.
Code
For iOS
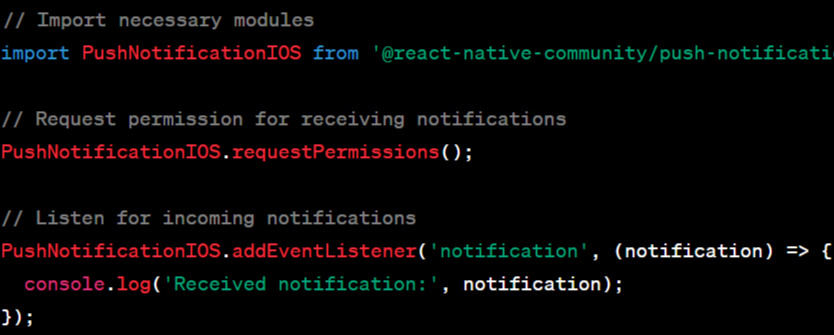
APNs is Apple’s dedicated service for sending push notifications to iOS devices. Integration involves configuring certificates, registering for remote notifications, and handling notifications using native code.
Code
Advantages
- Direct access to native APIs for efficient and platform-specific handling.
- Allows leveraging advanced features offered by FCM and APNs.
Challenges
- Requires knowledge of platform-specific development.
- Implementation may be more complex compared to using abstraction layers.
Expo Push Notifications Service and Other Cloud Services
It is a popular React Native development toolkit that offers its own push notification service, simplifying the process of sending notifications across Android and iOS platforms.
Expo Push Notifications
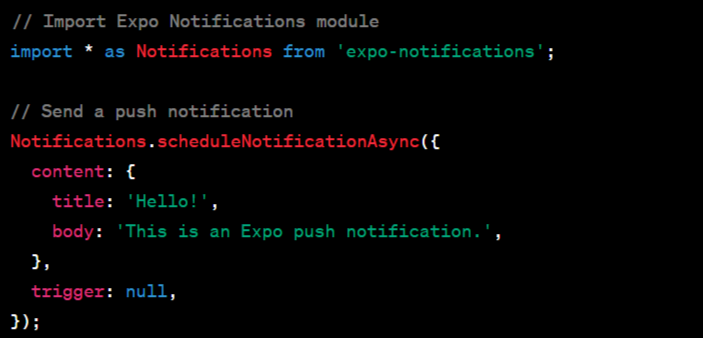
It provides a unified API for handling push notifications without platform-specific configurations. Developers can easily send notifications using Expo’s notification tooling and manage tokens for devices.
Code
Advantages
- Simplified cross-platform implementation without platform-specific configurations (Expo).
- Access to third-party cloud services offering additional features and analytics.
Challenges
- Limited customization and control compared to native solutions.
- Dependency on third-party services, which may have usage limitations or pricing models.
React Native Libraries like react-native-push-notification
React Native community libraries, such as react-native-push-notification, provide an abstraction layer over native notification services, offering a cross-platform solution.
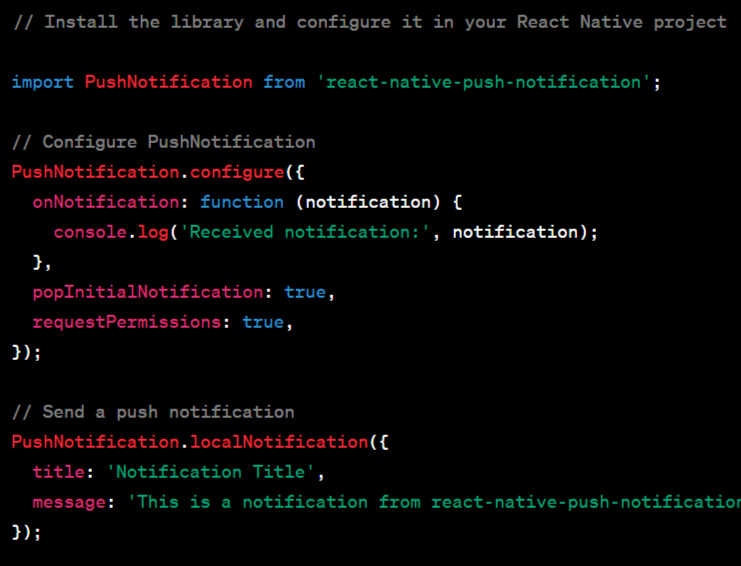
Libraries like react-native-push-notification abstract the complexities of native implementations and provide a unified API for sending notifications. Developers can utilize these libraries to handle notifications with simpler JavaScript code.
Code
Advantages
- Simplified cross-platform implementation with JavaScript.
- Offers a balance between native control and ease of use.
Challenges
- Dependency on library maintenance and updates.
- Might lack access to advanced features of platform-specific services.
How to add Firebase Push Notification In React Native?
To add Firebase Cloud Messaging (FCM) push notifications in a React Native app, you’ll need to follow these steps:
Step 1: Set Up Firebase Project
- Go to the Firebase Console: https://console.firebase.google.com/
- Click on “Add Project” and follow the setup instructions.
- Add Your App to Firebase:
- Register your app on Firebase and download the configuration file (google-services.json for Android and GoogleService-Info.plist for iOS).
Step 2: Install Required Packages
For React Native Firebase, you’ll need the @react-native-firebase/app and @react-native-firebase/messaging packages.
# Using npm

npm install @react-native-firebase/app @react-native-firebase/messaging

# Using yarn

yarn add @react-native-firebase/app @react-native-firebase/messaging
Step 3: Configure Firebase in Your App
Android Configuration
Add google-services.json to your Android/app directory.
Ensure the necessary dependencies and configurations are set up in the build.gradle and AndroidManifest.xml files.
iOS Configuration
Add GoogleService-Info.plist to your Xcode project.
Ensure you’ve configured your app to handle background notifications and other necessary settings in Xcode.
Step 4: Initialize Firebase in Your React Native App
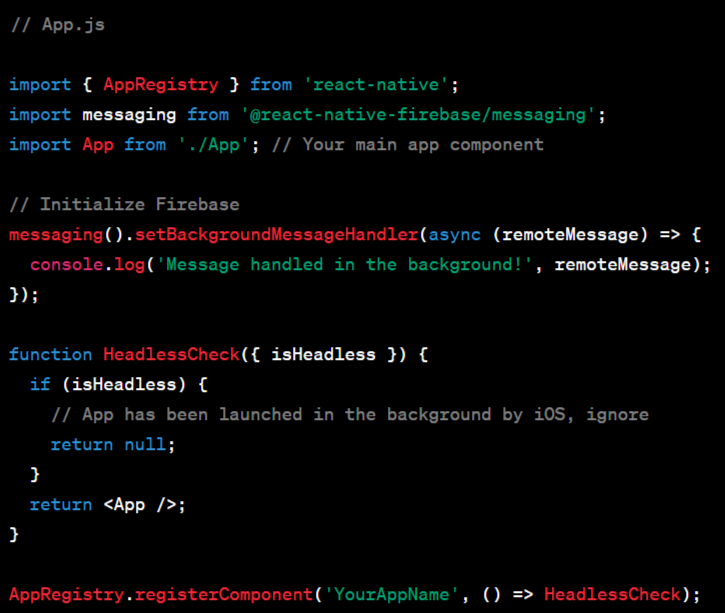
In your app’s entry file (e.g., App.js), initialize Firebase by importing @react-native-firebase/app:
Code
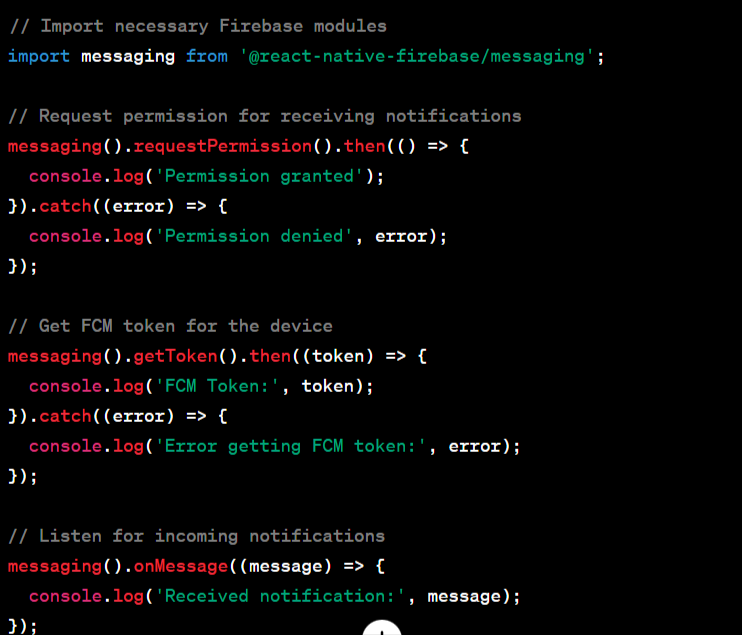
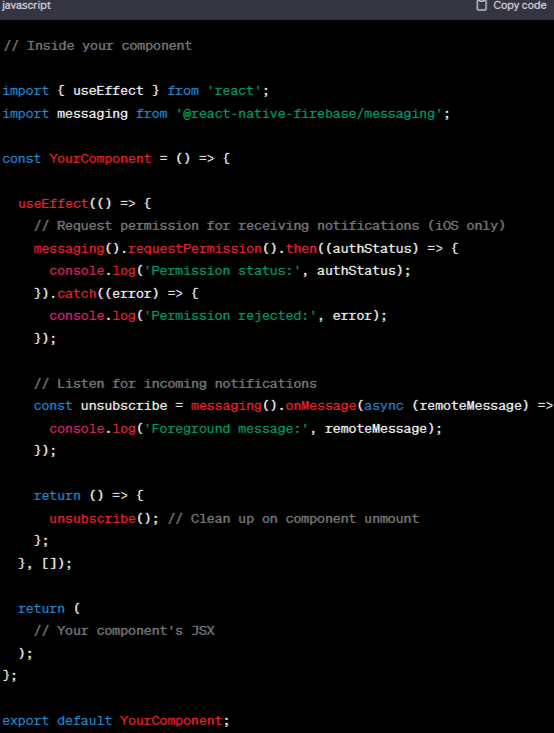
Step 5: Request Permissions and Handle Notifications
In your React Native components, handle the permissions and message reception:
Too Much Coding? There is a better way
You don’t have to implement the complex codes for sending push notifications yourself.
Push notification service providers offer platforms or APIs that simplify the process of sending push notifications. These services handle the underlying infrastructure, communicate with device operating systems, and provide user-friendly interfaces for sending notifications.
For example, you can go with LaraPush for a self-hosted push notification service or pick any other from our best picks.