Adding Code to your Website
Use LaraPush WordPress Plugin to simplify code integration in 1 click for Pro users! Forget manual code insertion in your websites. Just install the plugin and it will do the integration for you.
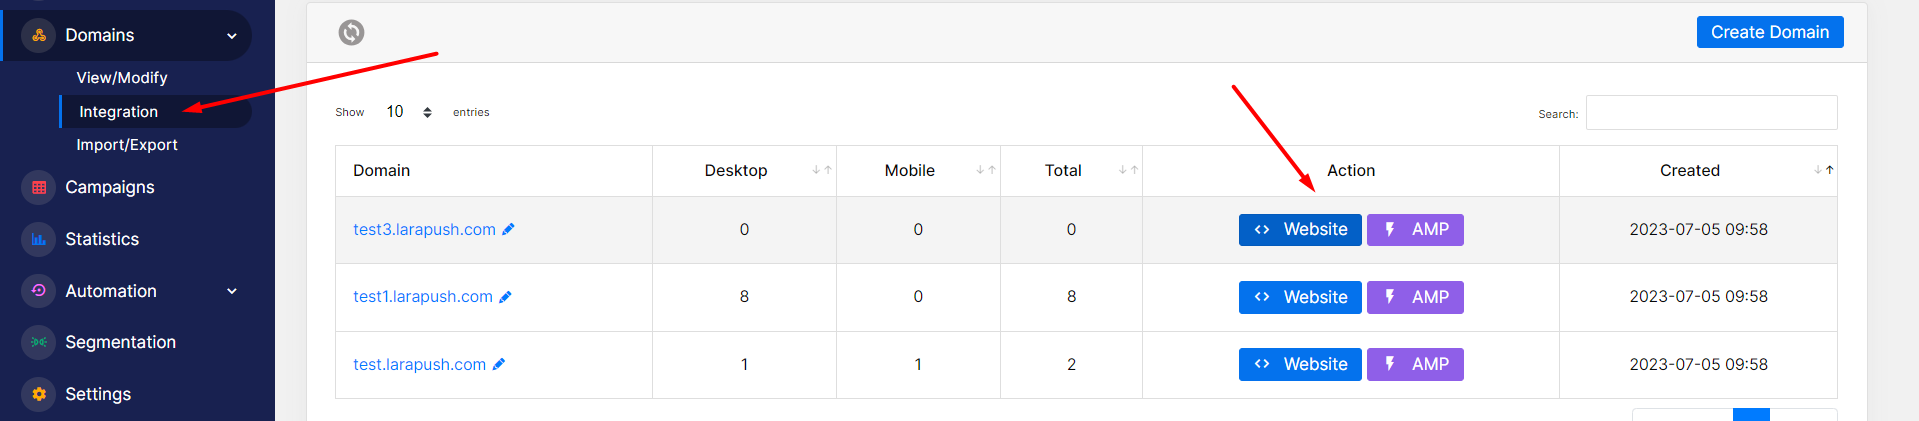
Once you have successfully added your domain, you will be directed to the Code Integration tab within your LaraPush Panel. Follow these steps to complete the integration process:
Select Domain Type: Navigate to to domains, click on integration, Choose whether your website is normal or AMP (Accelerated Mobile Pages)version. This selection will take you to the respective customization page.
Customize and Save: Explore the customization options available and make any desired changes. There are 4 types of prompt available, Custom prompt, Custom prompt with Backdrop, Default/Native Prompt, Full screen Prompt.
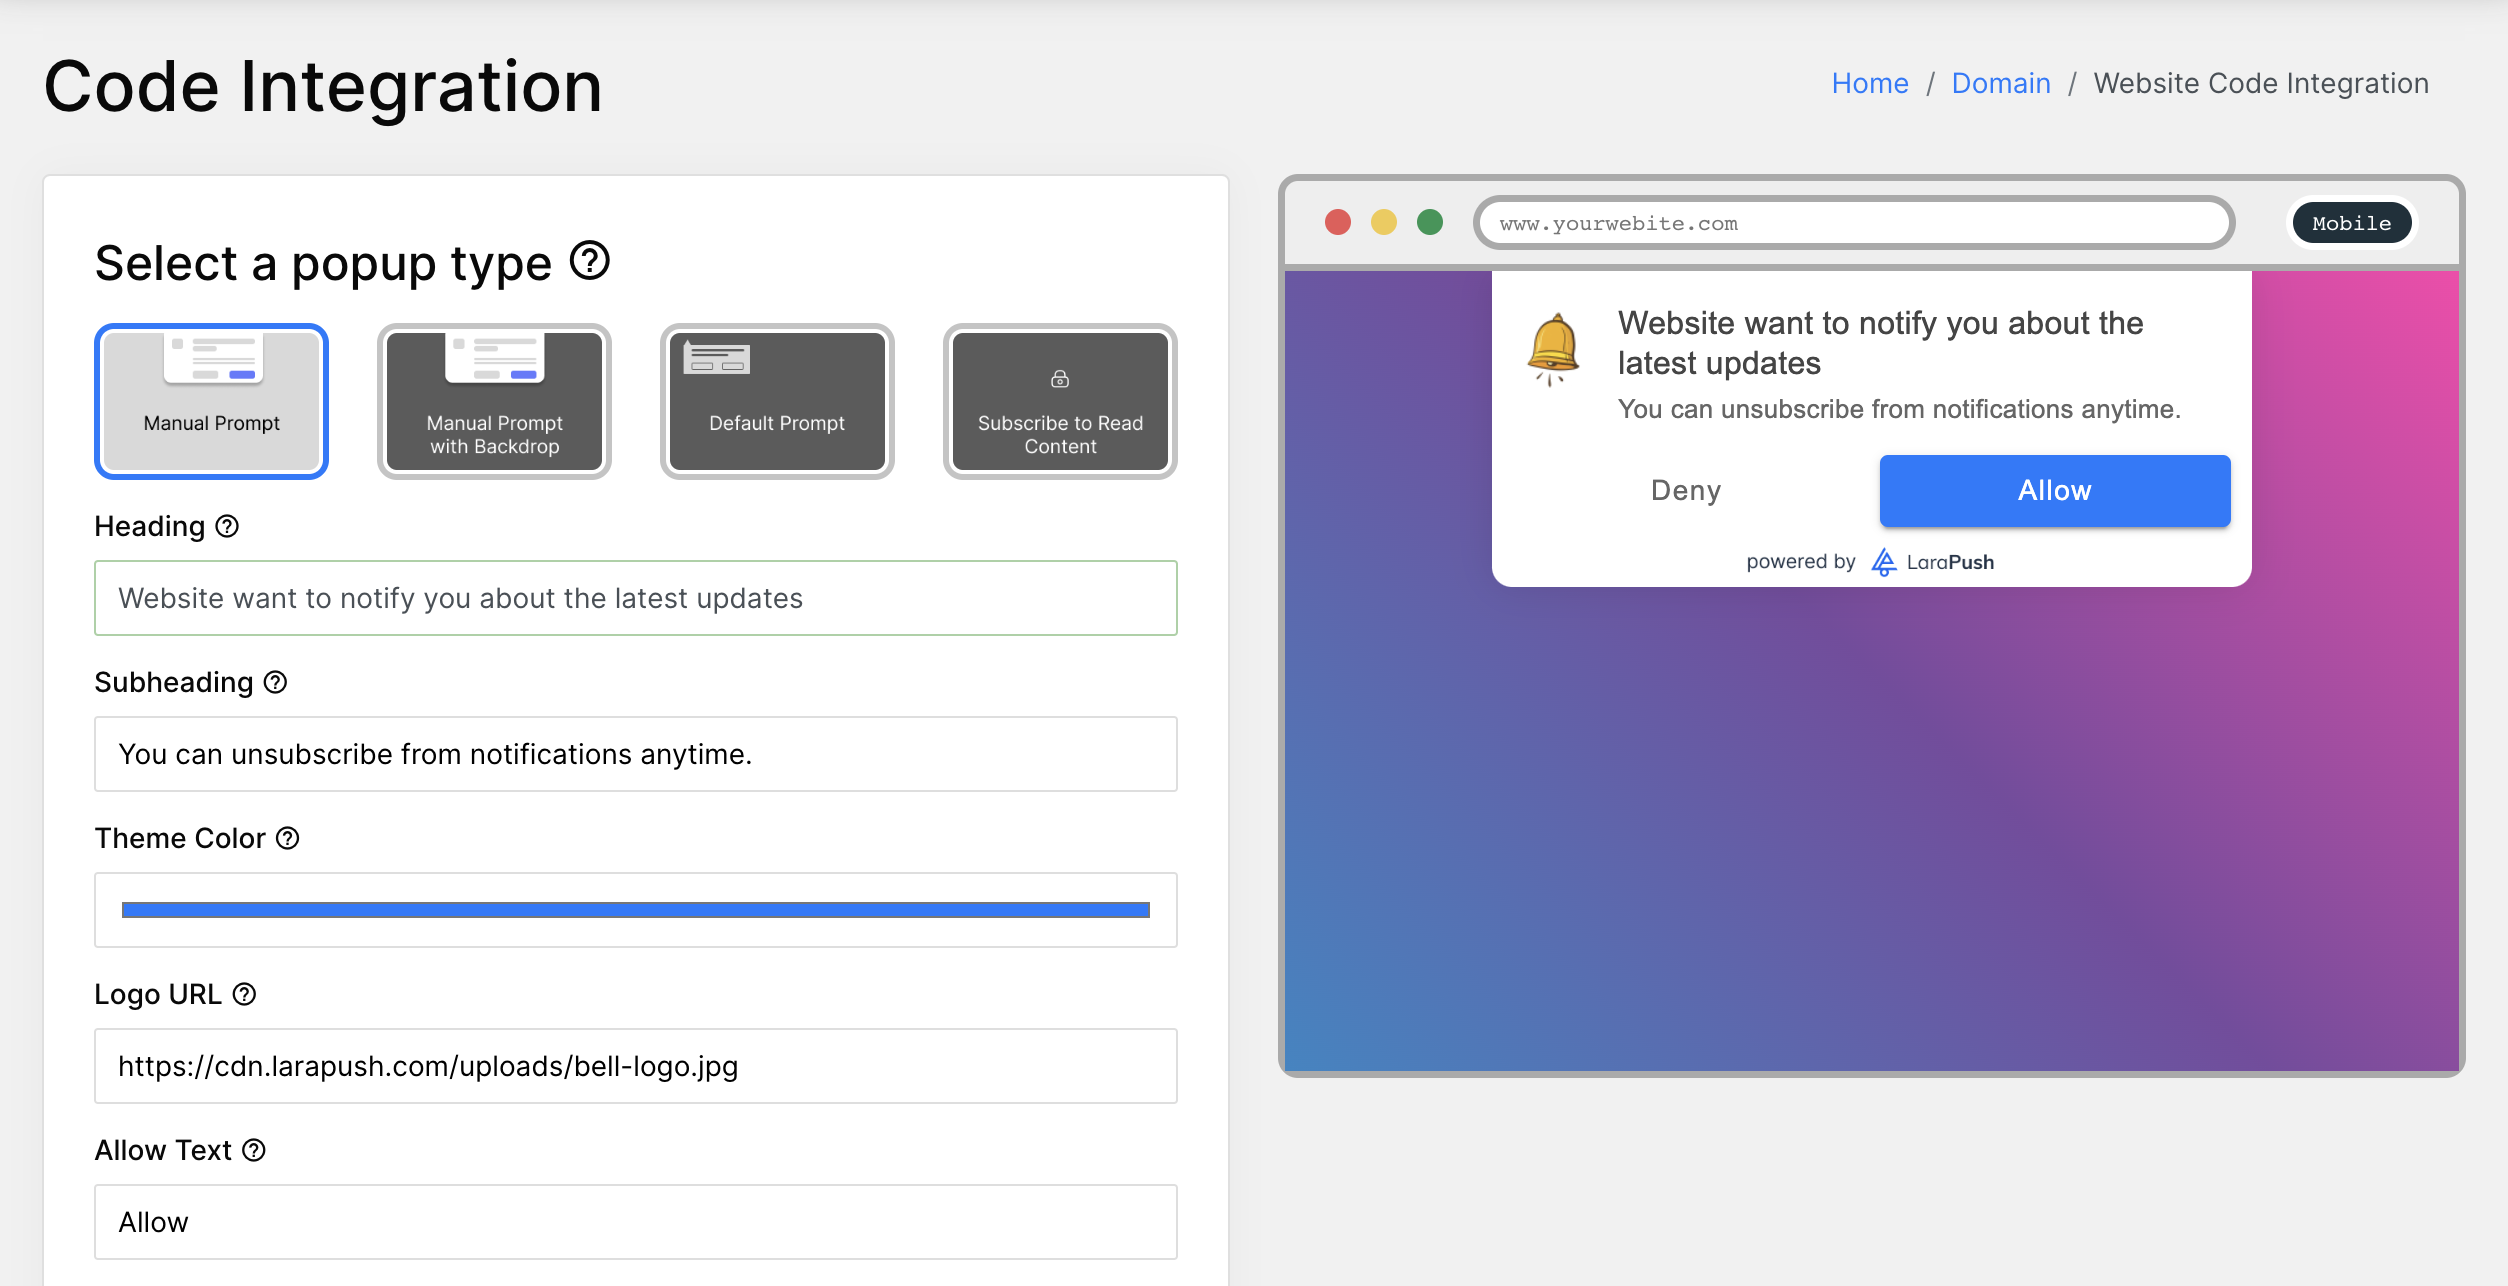
Explore the Advance Settings for more Customisation.
Enable Bell: If you wish to add a Bottom Bell, you can enable it from the 'Advanced Settings'. Choose the location for the Bottom Bell and customize the unsubscribe option as per your preference.
Prompt Location: Add prompt location in mobile left, right or center according to your need.
Custom Prompt appearance: Enable/disable custom prompt on mobile and desktop.
Set Prompt Delay : delay custom prompt, when someone visits your website prompt will aprear at given time.
Set Prompt Re-Appreance : Set custom Prompt Re-Appreance when somes declines your prompt, The prompt will re-appear at given time.
Preview your prompt before saving from the right side, Once you're satisfied, click on the "Save" button to apply the settings.
Use your Prompt in a way that you get most out of it. People usually use default prompt for better result.
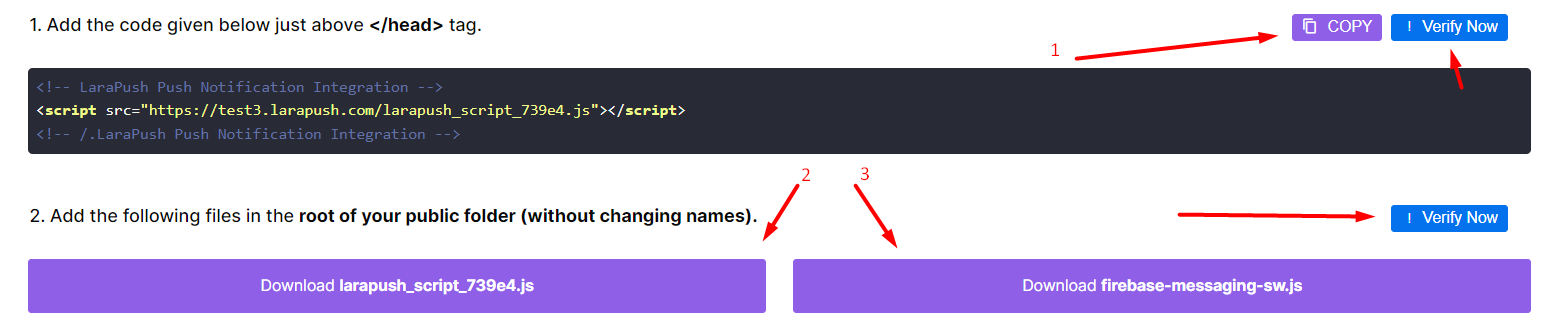
Copy and Paste the Script: Copy the provided script and paste it into the header section of your website's source code. This step ensures seamless integration. Afterward, click on the "Verify" button to check for any potential errors.
Upload Required Files: Download the two files provided and upload them to the public folder where you keep your website's code. If you are using a WordPress site, upload the files to your public_html folder.
If you are using CDN (Cloudflare) or Wordpress cache plugin, make sure to clear cache after uploading and adding code.
 5. Verify and Go Live: Double-check the verification status. If everything is in order, you are now ready to go live with LaraPush and start engaging your audience with push notifications!
By following these steps, you can effortlessly integrate LaraPush into your website and enjoy its powerful features for enhancing user engagement.