LaraPush iOS Push Notification Integration Guide
LaraPush provides a seamless way to integrate push notifications into your Progressive Web App (PWA), including support for iOS. This guide explains both methods: starting from scratch with a new PWA or integrating notifications into an existing one.
🔧 Option 1: New PWA Setup
Use this method if your website is not currently a PWA and you want to configure both the PWA and push notifications at once.
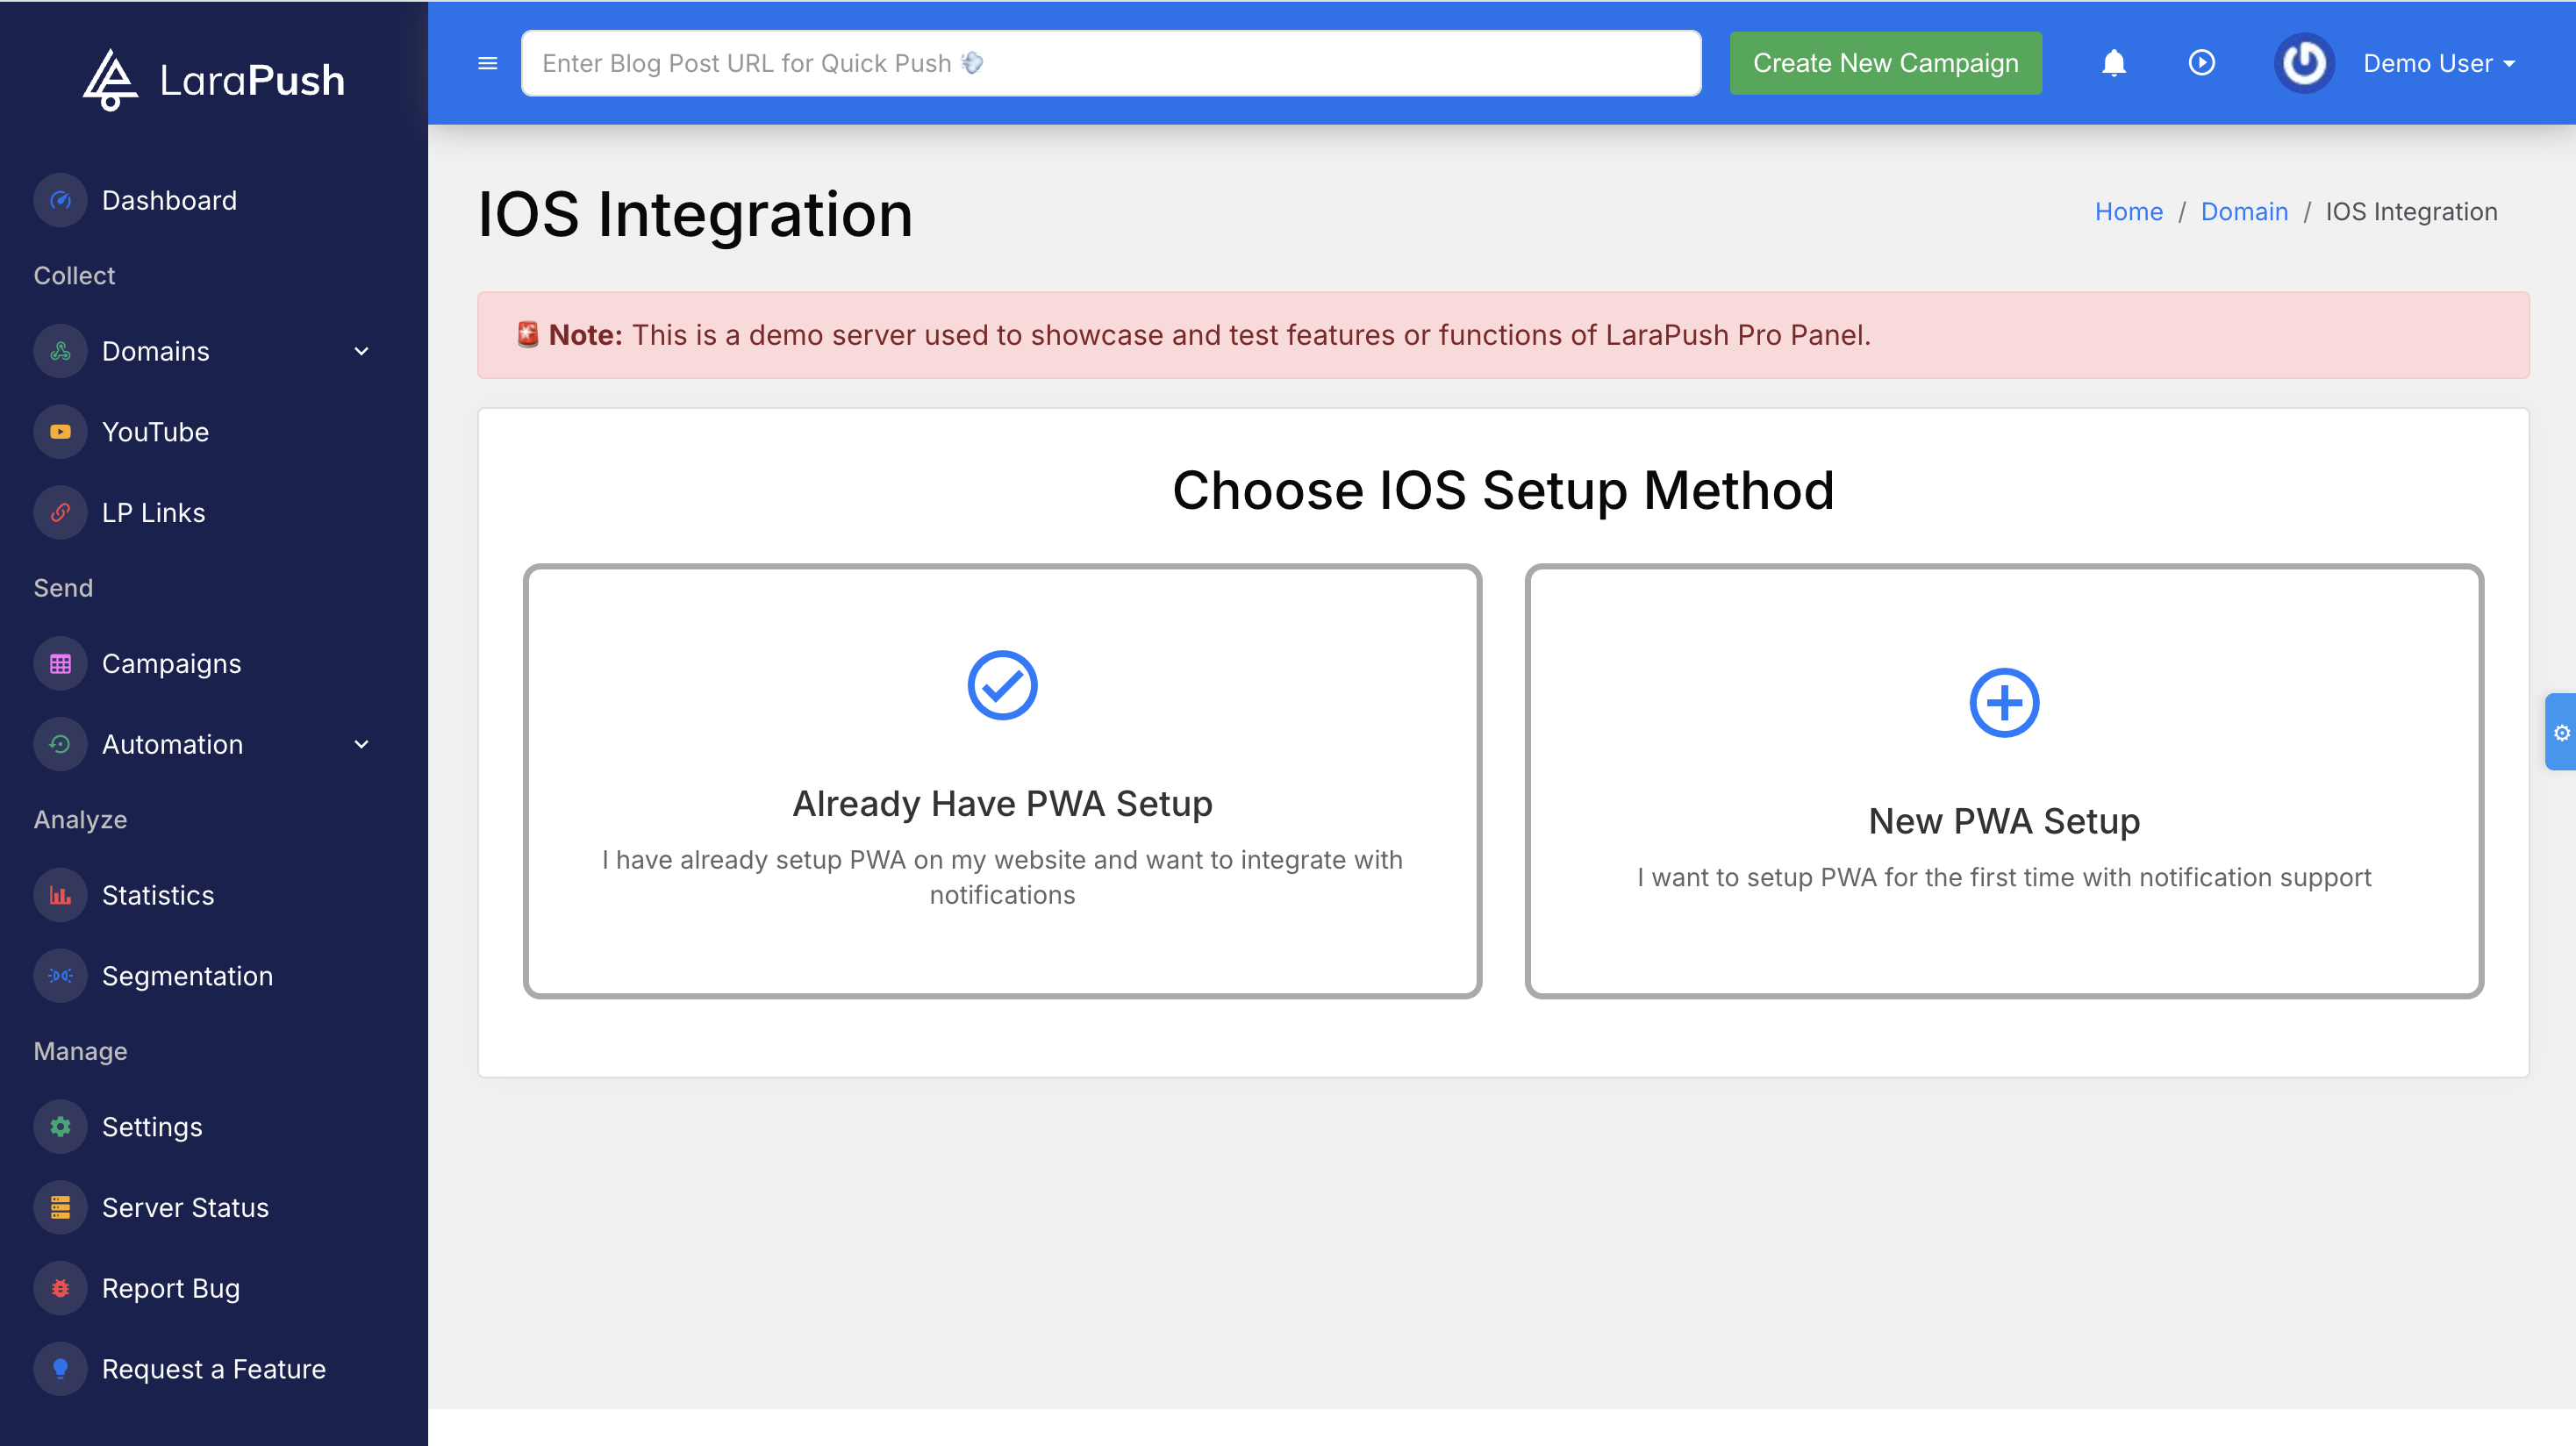
Step 1: Open iOS Integration in LaraPush
Log in to your LaraPush dashboard and navigate to:
Domain > iOS Integration
From the available options, choose:
- New PWA Setup
This will guide you through setting up your app structure, manifest, icons, and iOS prompt configuration.
Step 2: Fill Out Configuration Details
You’ll be asked to provide basic setup information:
PWA App Name:
The name that will appear under the app icon when installed on iOS.Start URL:
The initial page users will land on when launching your PWA from the home screen.Icon URL:
A public link to your PWA icon. Recommended size: 512x512 pixels.Prompt Text for iOS Users:
A custom instruction shown in a popup to guide users through enabling push support:1. Tap below icon and "Add to Home Screen"
2. Open the app from home screen
3. Click on allow to get notified.Reappear Time:
Set how frequently (in seconds) this prompt should reappear if ignored.
Once you’ve completed these fields, click Save.

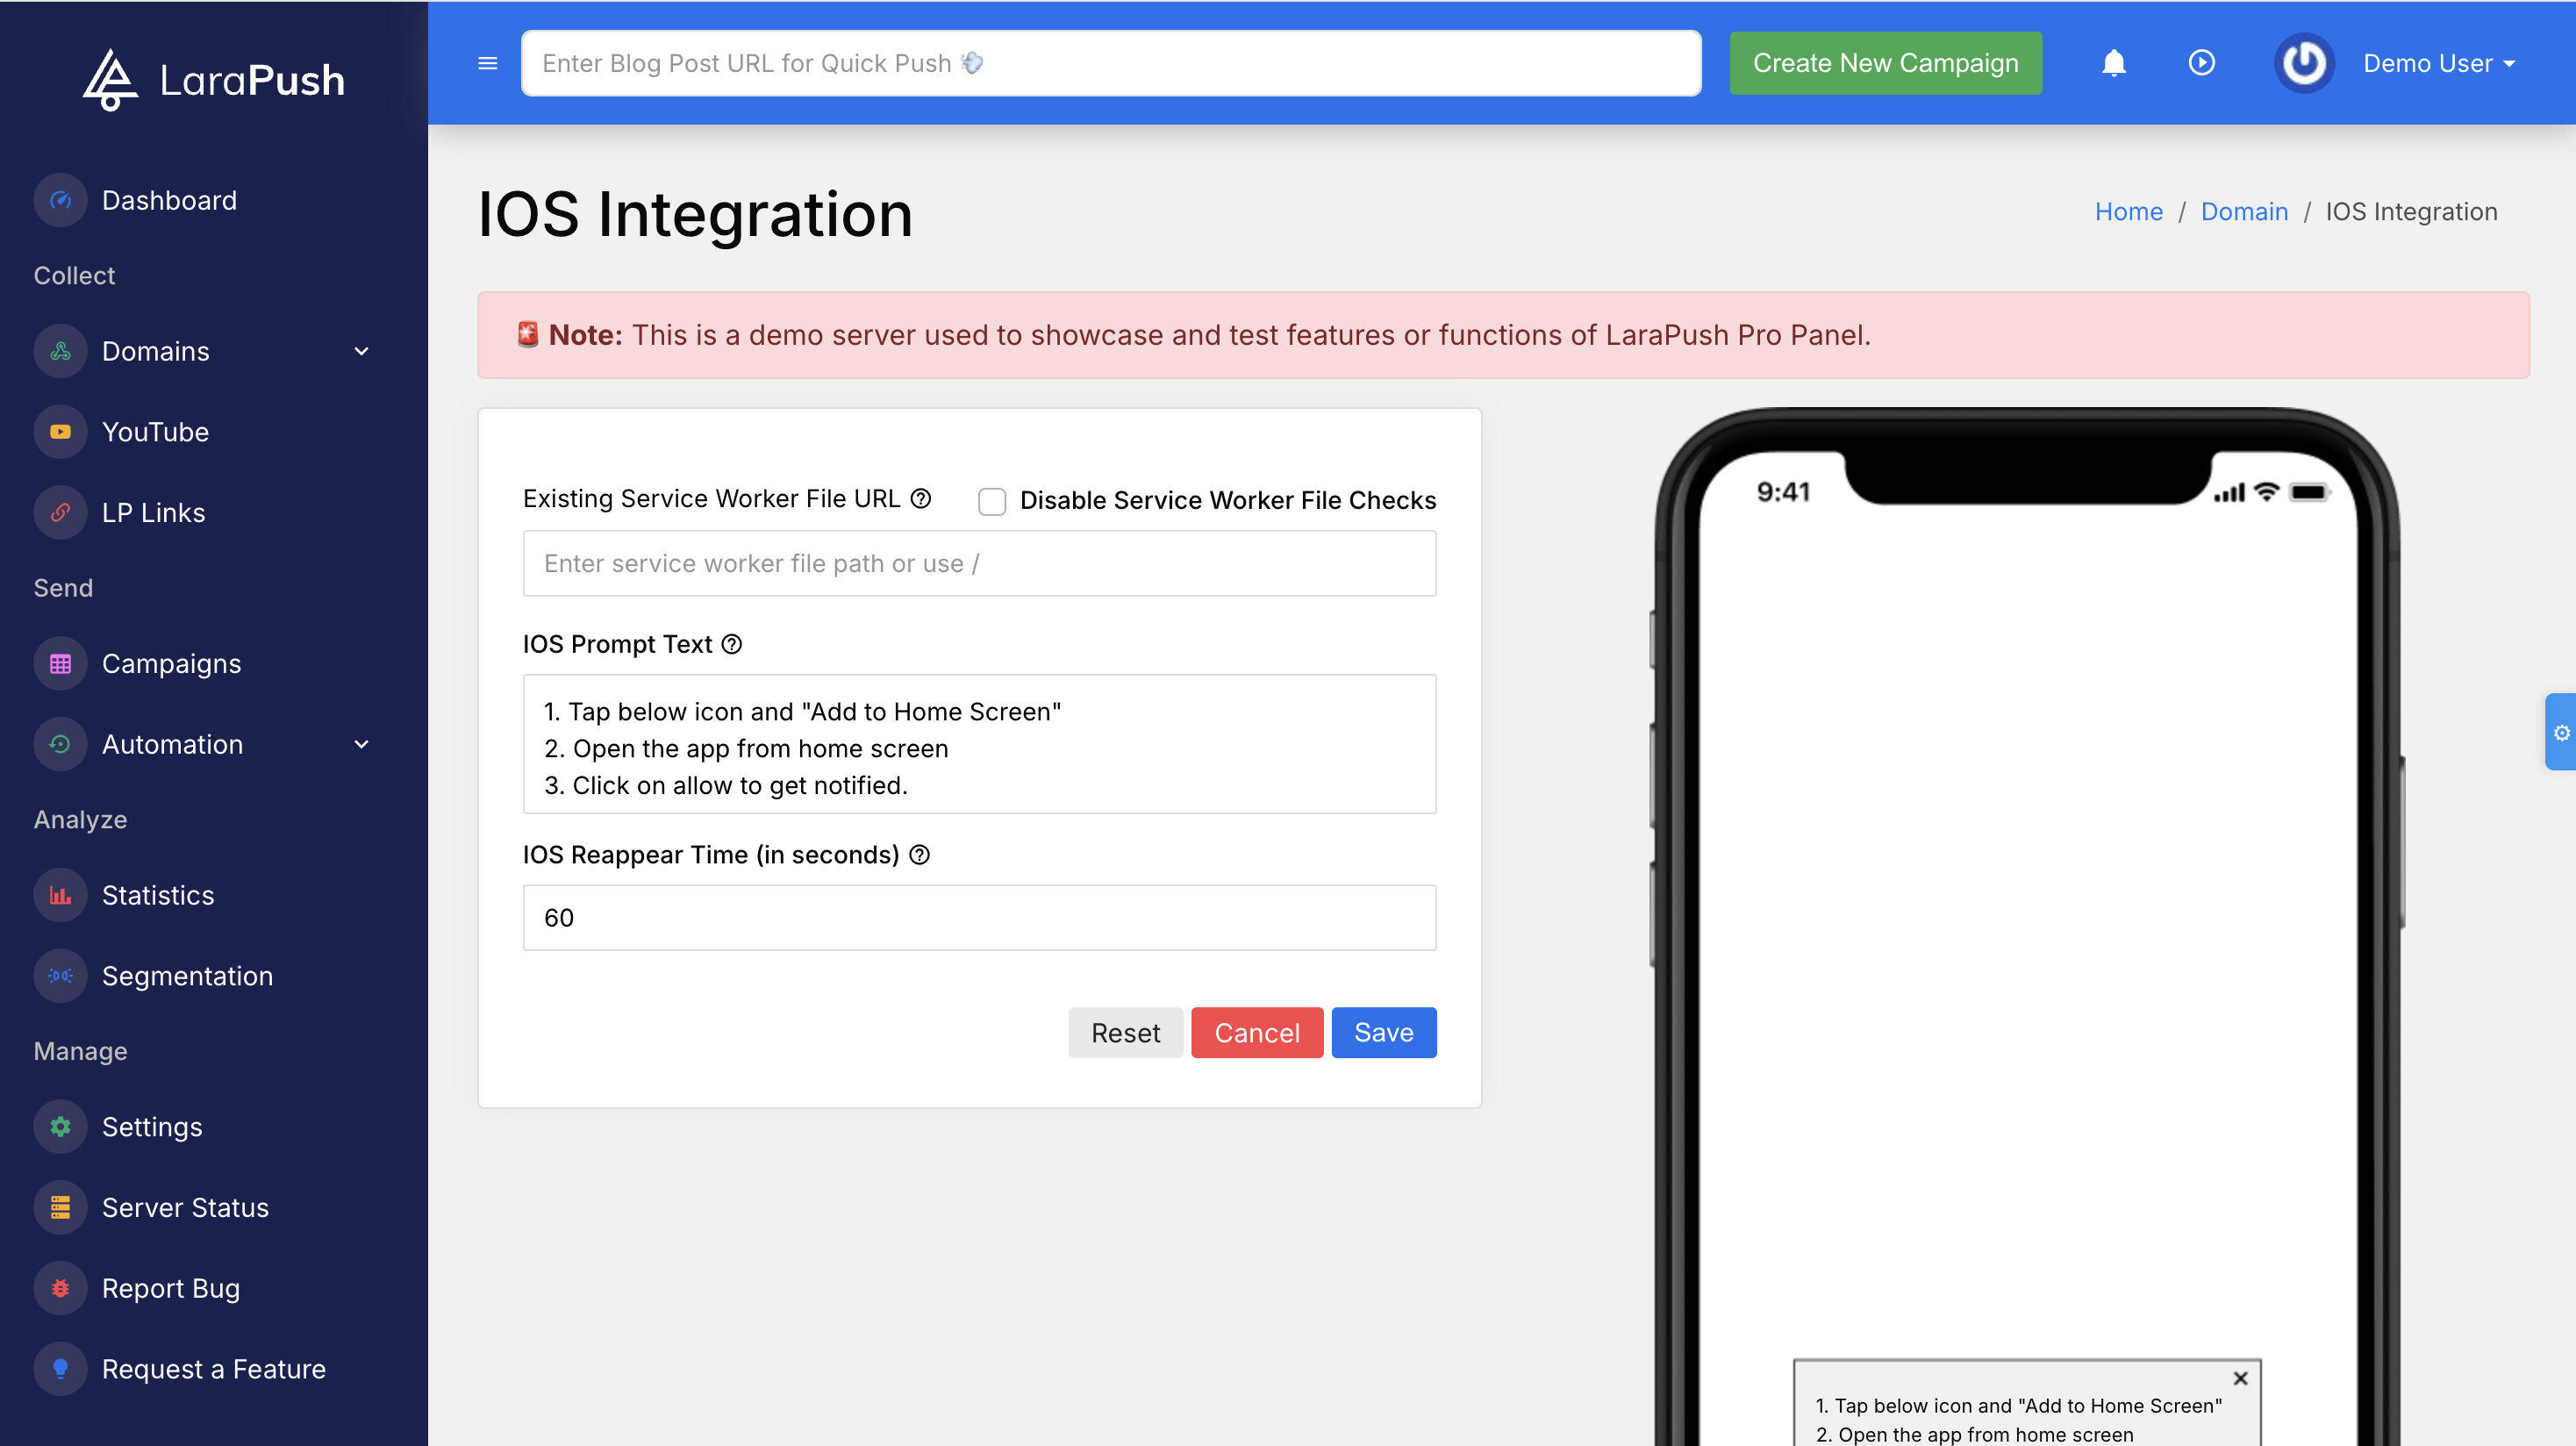
Step 3: Preview the iOS Prompt
After saving, the right panel will display a real-time preview of the iOS prompt. This simulates how it will appear on iPhones and helps ensure your message is clear and visually correct.
You can tweak and save again as needed.
Step 4: Add Integration Code to Your Site
To activate the LaraPush prompt and service worker, you must add a code snippet into your website’s <head> section.
This includes:
- Linking the manifest file
- Loading LaraPush script
- Initializing push notification configuration
(Note: The full code will be auto-generated in your dashboard. No need to write it manually.)
Step 5: Download and Upload Required Files
LaraPush provides a ZIP file containing three key files needed to complete the PWA setup:
firebase-messaging-sw.jsmanifest.jsonicon512.png
Instructions:
- Download the ZIP from your LaraPush dashboard.
- Extract the contents.
- Upload these files to the public root directory of your website hosting server.
Step 6: Save Configuration and Test
Once everything is added and uploaded, return to your dashboard and click Save once more to finalize setup.
Visit your website from an iOS device (Safari). You should now:
- See the popup prompt.
- Be able to follow the "Add to Home Screen" flow.
- Open the app and grant notification permissions.
Check the final confirmation box: ✅ "I confirm that PWA notification popup is visible in my application."
🔧 Option 2: Existing PWA Setup
Use this method if you already have a functional PWA and want to add iOS push notification support using LaraPush.
Step 1: Select Existing PWA Setup
Go to Domain > iOS Integration
Choose the second option:
- Already Have PWA Setup
This lets you skip PWA file setup and directly configure prompts and service worker connections.
Step 2: Fill Prompt Details and Service Worker Path
Complete the form fields:
Service Worker File URL:
Provide the existing path to your active service worker file (e.g.,/firebase-messaging-sw.js)Prompt Instructions:
Help users understand how to enable push by adding to the home screen and granting permissions.Reappear Time:
Set how often (in seconds) the prompt should reappear if dismissed.
Click Save to proceed.
Step 3: Add LaraPush Script to Your HTML
Insert the LaraPush embed code inside the <head> tag of your website.
This connects your domain to LaraPush and enables prompt logic.
Step 4: Update Your Existing Service Worker
Open your existing service worker file and add the push config provided by LaraPush.
This connects your app to Firebase and LaraPush’s backend, enabling delivery of push messages.
Make sure to use the exact details shown in your dashboard (project ID, keys, etc.).
Step 5: Test and Confirm iOS Prompt
After saving everything:
- Visit your site in Safari (iOS)
- Add to home screen
- Open the installed app
- Allow notifications
Finally, return to LaraPush and check:
✅ "I confirm that PWA notification popup is visible in my application."